Do you have a homelab that you manage? Do you have a few servers that you manage remotely? Ansible is the perfect way to remotely manage a whole fleet of servers, (and possibly more) all from a single shell. With the power of Ansible, you can remote into a dozen machines, run the ole ‘sudo apt update -y && sudo apt upgrade’ (or whatever works for your preferred flavor of Linux) and have them all run that command at the same exact time.

Simple updates withstanding, imagine the potential of a tool like this. This can cut down on workload and manage as many devices as you want, all from a single device. Well today, I will go over a quick and dirty way to setup Ansible at home so you can manage your little fleet of servers however you want to. A small note, I am writing this for beginners from my experience as a beginner. If you are looking for some best practices check out some of Ansible’s extensive documentation.
The first item that must be covered is that Ansible uses OpenSSH (an open-source implementation of the SSH protocol). SSH, is an invaluable tool that is used by system administrators to remotely access servers and run commands from a Secure Shell (as the name suggests) running encrypted traffic over port 22. Ansible needs to have SSH access to each server that you plan on running tweaks and configurations on. More or less, Ansible uses simultaneous SSH sessions (all stemming from the same box) to execute commands and run configuration files known as “Playbooks.”
Step 1. Ensure that the Ansible machine has SSH access to each machine. Important note: You must have already agreed to remember the SSH Fingerprint. SSH from your Main Ansible CONTROL NODE into the MANAGED NODE before continuing with the setup process. Agree to remember the fingerprint and successfully log in. Another helpful albeit risky tip is that the usernames and passwords are the same across the Managed Nodes. When commands requiring ‘sudo’ privileges are issued, you can enter a command once and enter the corresponding passwords all in one whack. Continuing with the SSH train, you need to have working SSH keys on each managed node. For Ansible, I just generate an SSH key and title it Ansible, and ensure that each Server has the public key. I know, this is not an ideal practice for information security, but I think for a simple homelab teaching environment, we can let this one slide. Its not production afterall.
Step 2. Assuming you have some Debian Based system, you can run ‘sudo apt install Ansible’ and download Ansible. If you think you’re better than everyone else and are running RHEL, you can figure this one out on your own. Agree to the download and git her done.
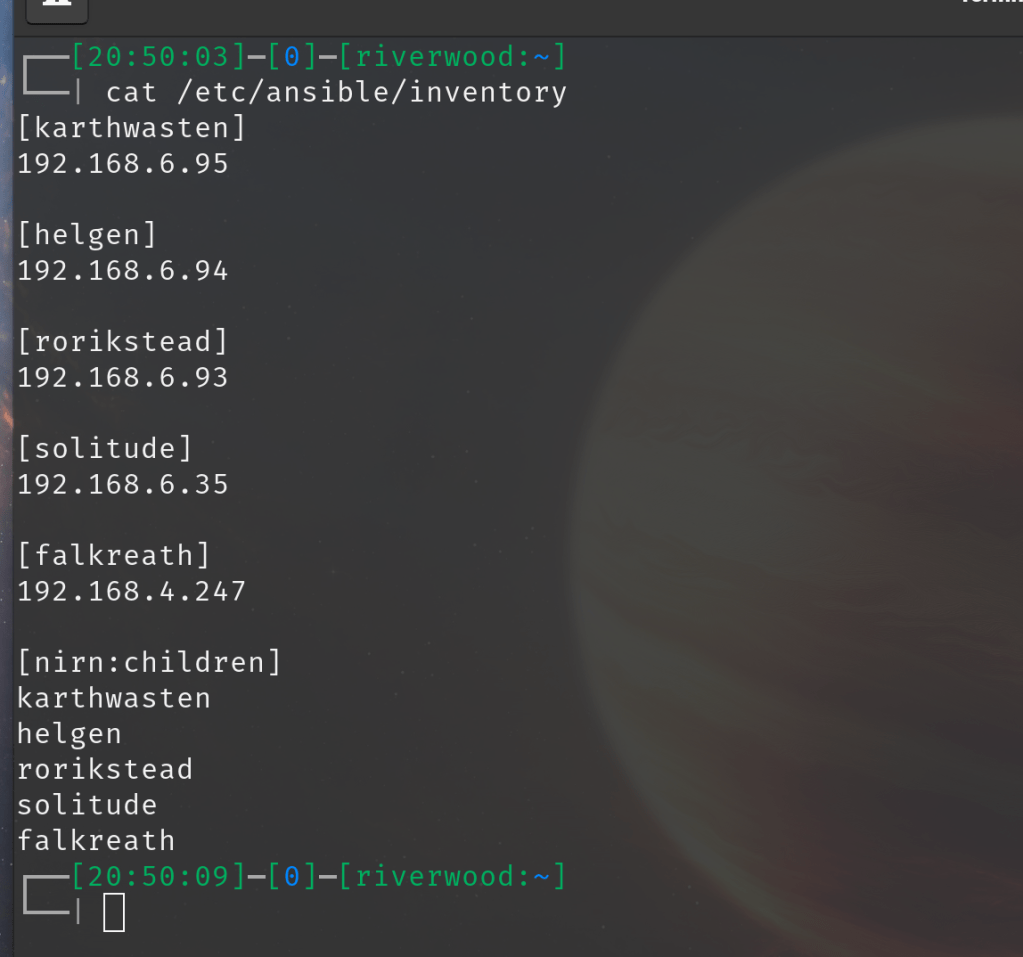
Step 3. From there Ansible will attempt to find some type of “inventory” file. Make a file within /etc/Ansible/ named inventory. If no directory for Ansible exists create one, then drop the inventory file in there. This is the file where the fleet of Servers are specified via IP address. Notice below, I have all of my IPs specified and labeled as variables using Skyrim City names. Creative, I know. For more information on building an inventory file, check out the official documentation.
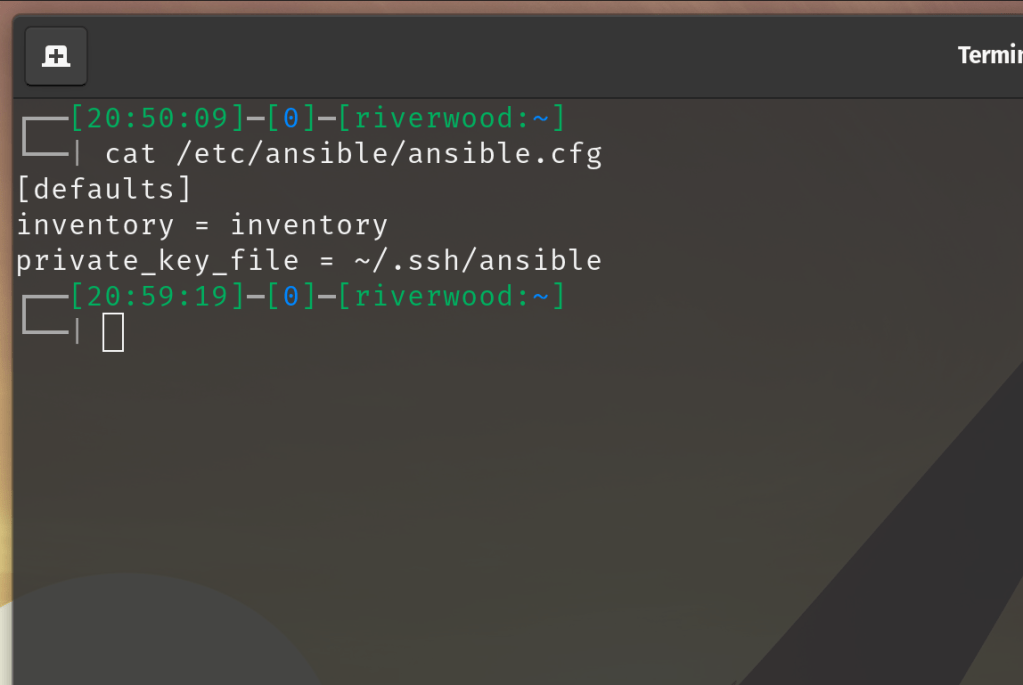
Step 4. Create a configuration file for Ansible. This will tell Ansible where to search for the inventory file as well as what SSH keys to use when accessing remote machines, or Managed Nodes. As you can see from the screenshot below, this can be as simple as three little lines.
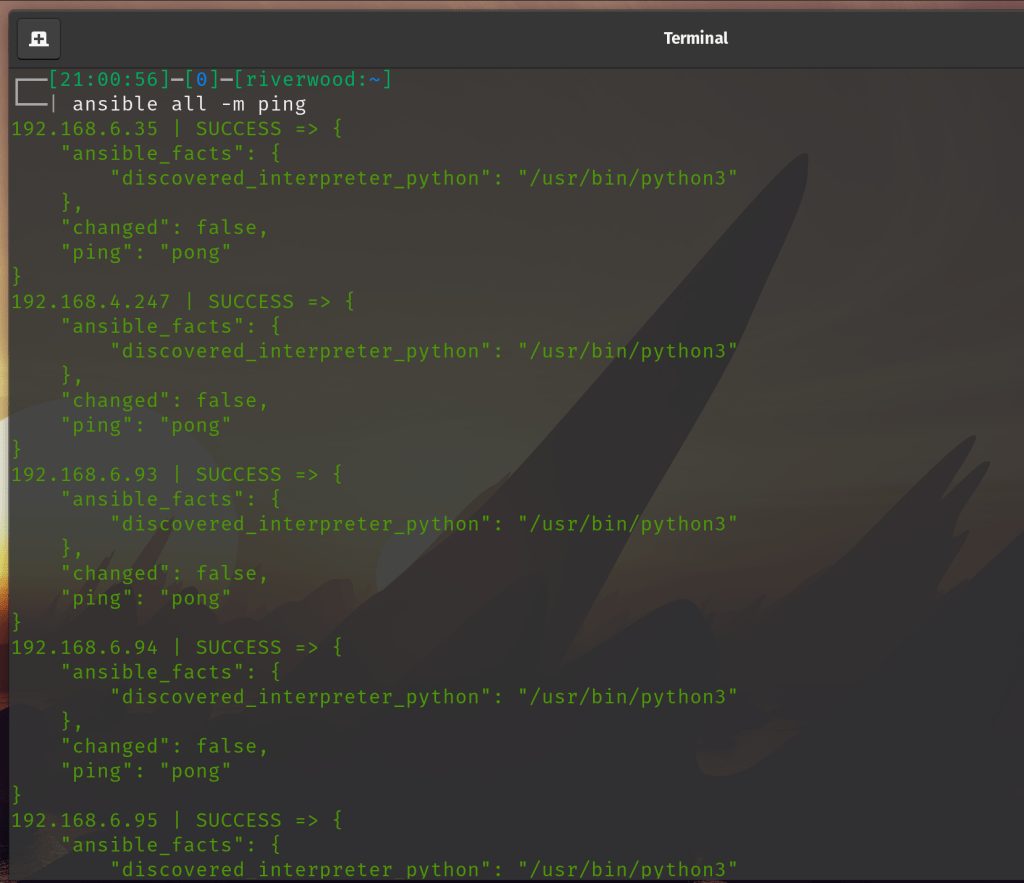
Step 5. Test out your Ansible install with a simple ping command. Run ‘Ansible all -m ping’. If everything worked out, this should tell Ansible to read your configuration file (ansible.cfg) which will tell it where the inventory list is and what SSH key to use, to send a connection test to all listed machines. Now here’s the kicker, it isnt an actual ICMP ping that is issued. It is an SSH connection attempt, and if that is successful, you receive back a ‘pong’.
Now that Ansible is successfully installed, you can issue strings of commands using yaml files and run these “Playbooks” to accomplish whatever your heart desires. I will go over a few simple Ansible playbooks that I setup for basic tasks to start you off. The first one I wanted to setup was a playbook to install essential apt packages to each new server installation. Check it out.
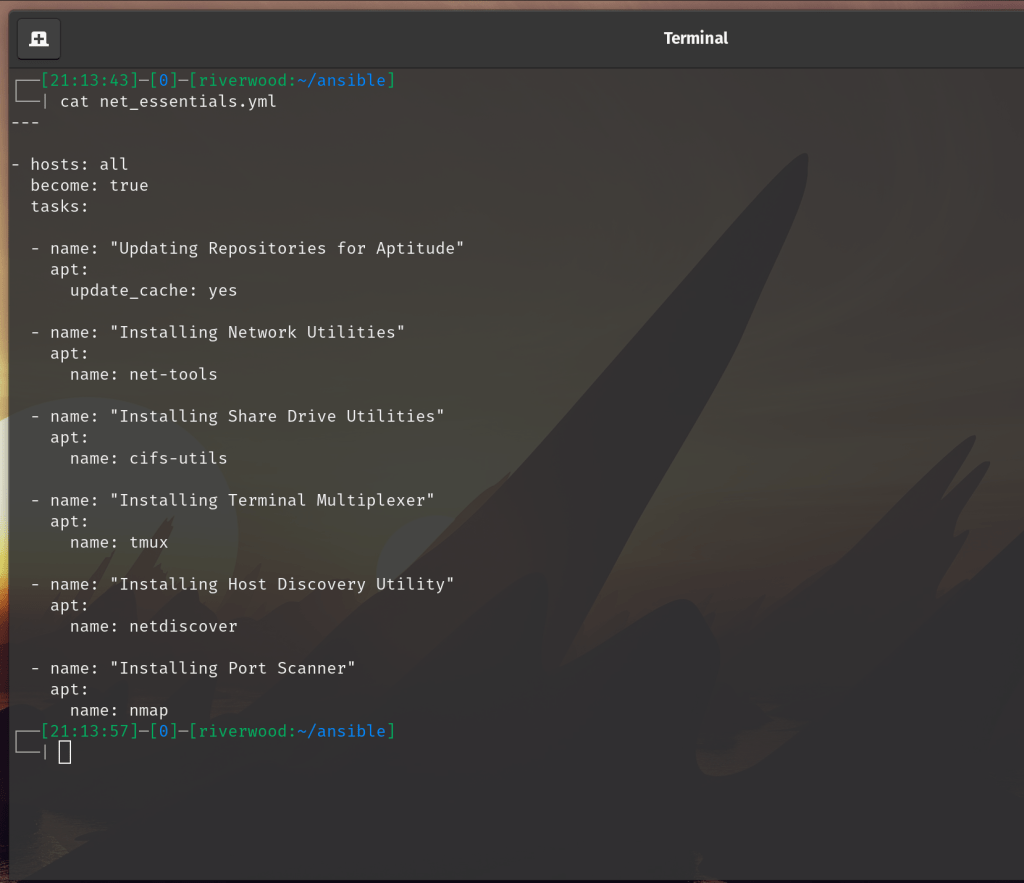
Text for easy copy + paste
---

- hosts: all
  become: true
  tasks:

  - name: "Updating Repositories for Aptitude"
    apt:
      update_cache: yes

  - name: "Installing Network Utilities"
    apt:
      name: net-tools

  - name: "Installing Share Drive Utilities"
    apt:
      name: cifs-utils

  - name: "Installing Terminal Multiplexer"
    apt:
      name: tmux

  - name: "Installing Host Discovery Utility"
    apt:
      name: netdiscover

  - name: "Installing Port Scanner"
    apt:
      name: nmap
Keep in mind, syntax is pretty important with these yml files. I’ve added comments for pretty much each task or package that is being downloaded. Output from a playbook will look something like this:
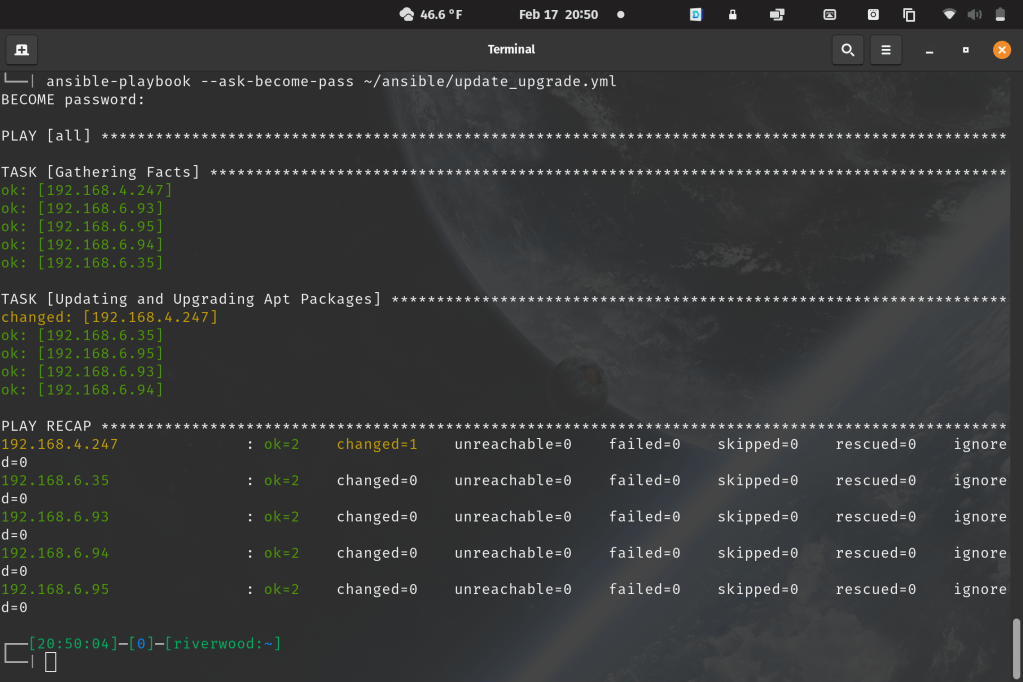
Run Ansible playbooks with the command Ansible-playbook. The syntax will look something like this:
Ansible-playbook --ask-become-pass [location of playbook]/playbook.yml
The –ask-become-pass option allows the option to pass ‘sudo’ level privileges to each server, and will prompt you for a BECOME: password. This is where that tip from earlier comes in handy, with the same passwords.
The next teeny little playbook I made is a simple reboot. After installing everything point your fleet at this:
---
- hosts: all
  become: yes
  gather_facts: true
  tasks:

  - name: "Reboot a Linux machine"
    reboot:
      reboot_timeout: 1800
If you enjoyed this, and you’re up for more of a challenge, try spinning up a K3S cluster using Ansible using this Github.
Keep on learning and always stay curious.
