We have all been there. After discovering the variety of Linux Distributions that are out there, we want to try them all. We want to boot each one up individually and see what each desktop experience is like. Distro-hopping is a hell of a drug.

Now this brings up quite the conundrum. Do you go out and purchase several USB thumb drives for each distro? Or do you painstakingly boot and re-image the drive after each use? Neither option is ideal, whether it be for time or money.
Well you’ll be pleased to know, that there is a third option. Let me present to you, Ventoy. Per their documentation, “Ventoy is an open source tool to create bootable USB drive for ISO/WIM/IMG/VHD(x)/EFI files.” This is a fancy way of saying you can load up a single USB drive with as many bootable images as it can hold, and use that one thumb drive to boot from any of those images.
This lovely tool eliminates the need for a dozen USB thumb drives and allows you to consolidate your ISOs into one place for future use. Ventoy also allows the thumb drive to be used as storage, assuming the drive is large enough.
Setting up Ventoy is absolute cake and takes less than 5 minutes. Assuming this can save you hours in the future, I’d say this is a solid return on investment.

First step is to go to this site: Ventoy Downloads and find the appropriate download for your Operating System. You will be redirected to a Github page, dont panic. Scroll down to ‘Assets’ and download the correct file for your OS.
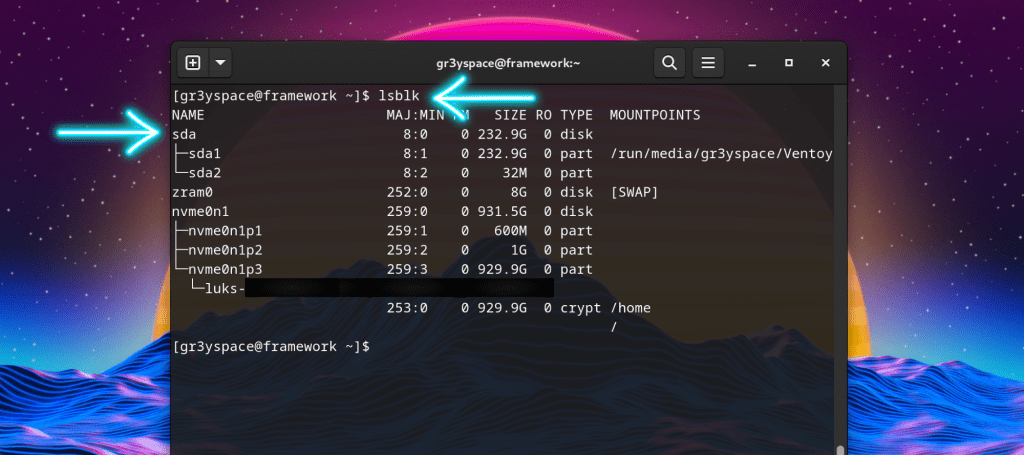
While that downloads, plug in your USB and determine where your USB is located logically. Run the command ‘lsblk’ and see which directory is your USB. It should look something like sda or sdb as in /dev/sdb.
After the file downloads, unzip the file and place it in a directory that is easy to remember. Navigate to the unzipped directory and find the file, Ventoy2Disk.sh. This is a shell script that is going to partition your USB drive and set up the Ventoy tool. Execute this script.

Depending on the operating system, unzipping and running the shell script will vary slightly. The example uses a Linux based system. After executing the Script, the output should look like the output below.
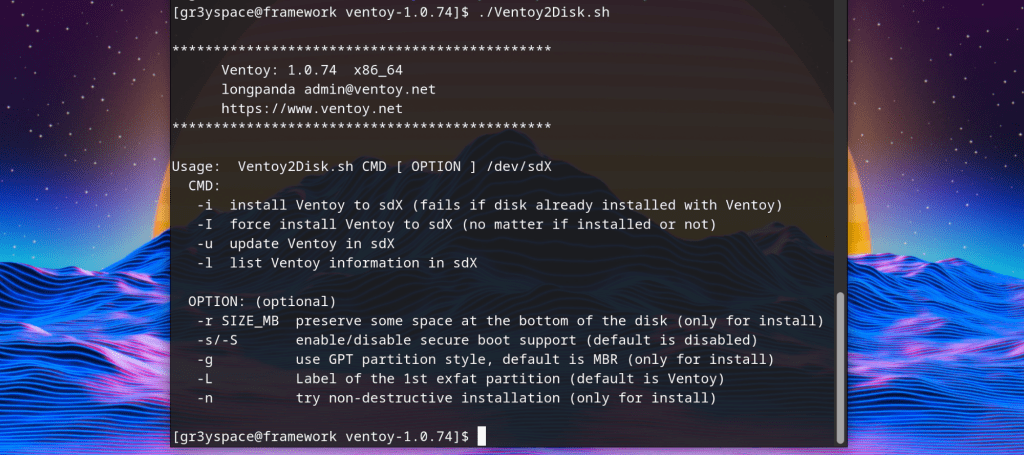
Notice the first option. The -i switch allows us to specify the directory to install the tool in. If the USB is located at /dev/sdb then run the command ./Ventoy2Disk.sh -i /dev/sdb (adjust this according to the location of your USB drive, which we determined using lsblk)
BE CAREFUL TO MAKE SURE THIS IS THE CORRECT DIRECTORY. Follow the instructions on the script and confirm. This tool formats the disk and will delete data on the drive, so take special care when determining your USB drive.
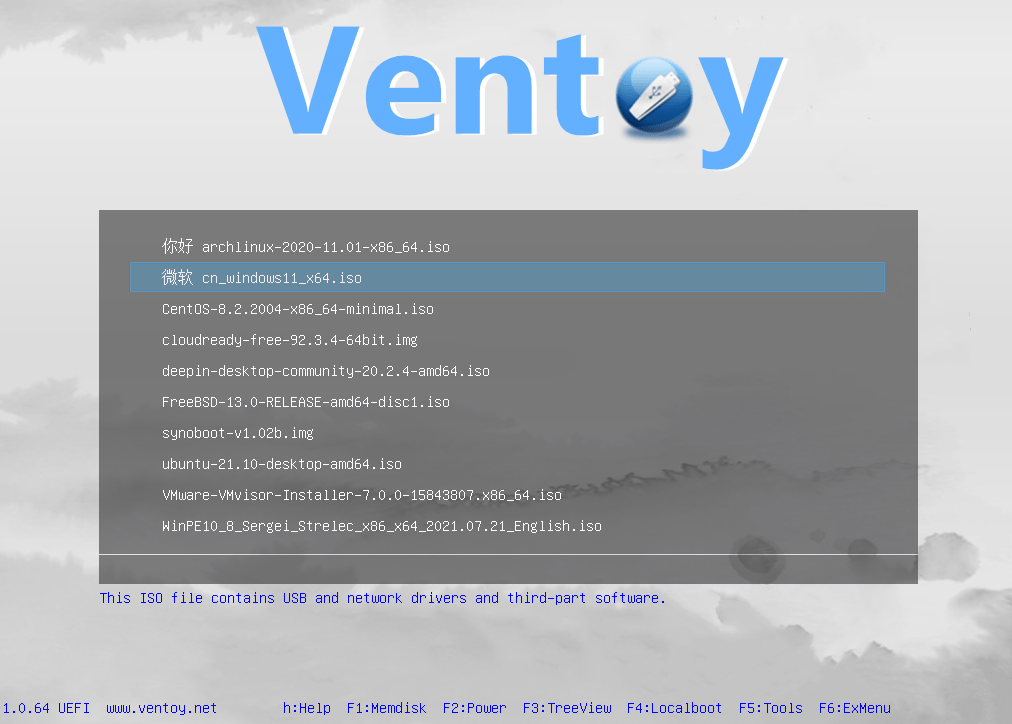
Assuming everything went according to plan, your USB should auto-mount and it will be titled Ventoy. The Ventoy directory is where you will be storing all of your ISOs. Go ahead and load up this directory with all of your ISOs and give it a try. Booting from this drive will present a spashscreen like this.
After using Ventoy for a few years, I will say you can use whatever USB drive you want, but for an all-in-one solution like this I have found the most success with a M.2 to USB Adapter adapter and a cheaper Sata M.2 Drive. The SATA speeds are insane and beat any USB drive you can find, and the storage is pretty awesome too. This is not required to get mileage out of Ventoy, just something I have found made my user experience way better.
I hope you learned something today and I hope this tool makes your Linux experience better. As always, feel free to reach out about anything. Stay curious.
