Now that we have a solid understanding of Virtual Machines or VMs, it is now time to cover containerization.
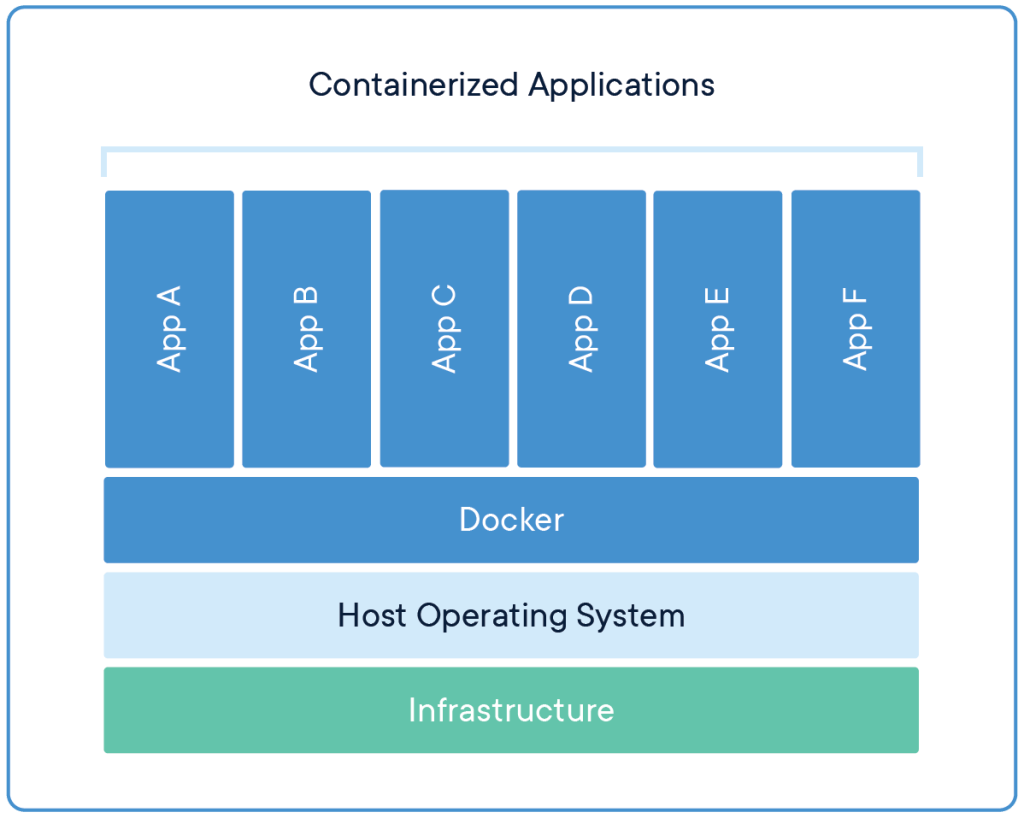
Containerization refers to running a virtual process or service in a limited environment, with only pre-established access to storage volumes that you have allowed.
Now what the heck does all that mean? It just means you can run applications or services in the background of your Linux install (and yes, also your Windows install) and these services that are running only have access to data that you have allowed them to access. You can almost think of a container as a prepackaged virtualized service.
Outside of privacy benefits, these Containers also are very easy to spin up and tear down. And unlike other applications that may have their metaphorical roots wrapped around other vital infrastructure, tearing down a container is quick, easy, and clean.
I have found this to be my preferred means of installing background services and exposing them on my local network. They are easy to view, troubleshoot, and nuke if I feel so inclined. All while being able to set them up in a matter of minutes if I wanted to.
Well what the heck is Docker?

Docker is one of the most popular suites that allows for containerization and has both free and paid options. Everything we will cover today will be free usage of Docker.
There are a few terms you might find useful to understand when working with containers:
Key Terminology:
Container – a sandboxed process isolated in memory and running instance of an image
Image – a pre-built filesystem in a format ready to be understood by a container runtime (in this case docker)
Volume – persistent data outside of the containers sandboxed filesystem, usually allocated during install
This tutorial is intended for a system running Ubuntu 20.04, (such as the one we set up in a previous post)
Preparation Steps:
Step 1: Remove any old versions by running this command:
sudo apt-get remove docker docker-engine docker.io containerd runc
Step 2: Update the package index and allow apt to use a repository over HTTPS by running these two commands:
sudo apt-get update

sudo apt-get install \
ca-certificates \
curl \
gnupg \
lsb-release
Step 3: Add the official Docker GPG Key
curl -fsSL https://download.docker.com/linux/ubuntu/gpg | sudo gpg --dearmor -o /usr/share/keyrings/docker-archive-keyring.gpg
Step 4: Set up a stable repository by running this command:
echo \
"deb [arch=$(dpkg --print-architecture) signed-by=/usr/share/keyrings/docker-archive-keyring.gpg] https://download.docker.com/linux/ubuntu \
$(lsb_release -cs) stable" | sudo tee /etc/apt/sources.list.d/docker.list > /dev/null
Now that we have ensured:
-There are no previous versions of Docker installed,
-We have updated the package index to allow for updates over HTTPS,
-We have set up a stable repository to pull updates from,
It is time to install Docker!
Step 5: Update the package index and install the latest versions of the listed packages:
sudo apt-get update

sudo apt-get install docker-ce docker-ce-cli containerd.io
Step 6: Test your new docker install by running the following command:
sudo docker run hello-world
Assuming everything was done properly and the stars have aligned, there should be a cute little “Hello from Docker!” message that is displayed. This is a good thing.
Read this little note for some more information on how the Docker Client has interacted with the Docker daemon. It might help solidify the concept if you are a bit shaky.
Now until this point, this has been one of the more technical posts, but it has set the foundation for Docker Usage, and Containerization as a whole in the future.
Thanks for sticking with it, and I hope you got something useful out of this post.
Thanks for reading and stay curious, friends.

One response to “Containerization and Installing Docker”
[…] This tutorial is intended for a system running Docker, (such as the one we set up in a previous post) […]
LikeLike