Do you remember the days when software and operating systems came on a disk? When purchasing a new version of Windows came on a Compact Disk that needed to be inserted into their computer?
Well gone are the days of booting from disks. No longer does one need to use that caveman technology to update their operating system.
These days all of that is done with a USB drive. If one were to purchase an operating system (not sure why they would) it would be delivered on a single thumb drive. Now how do they put that OS onto a USB Drive? Well if that is your question, you’re in luck. That is what I aim to teach.
First course of action would be determining your operating system of choice. This is what will be “burned” onto the thumb drive and your computer will boot from this USB. Keep in mind, that “burning” data onto a thumb drive doesn’t actually damage the drive, it only temporarily takes up the entire drive.
For this example, our operating system of choice is Ubuntu 20.04.
After we have downloaded the operating system from Canonical’s site, we now have an ISO file. An ISO is the preferred file format of the disk image of the Operating System.
Next step is to find a tool that will help burn the ISO onto the USB. This will help your computer recognize the USB as a bootable device rather than just a storage device with an ISO on it.
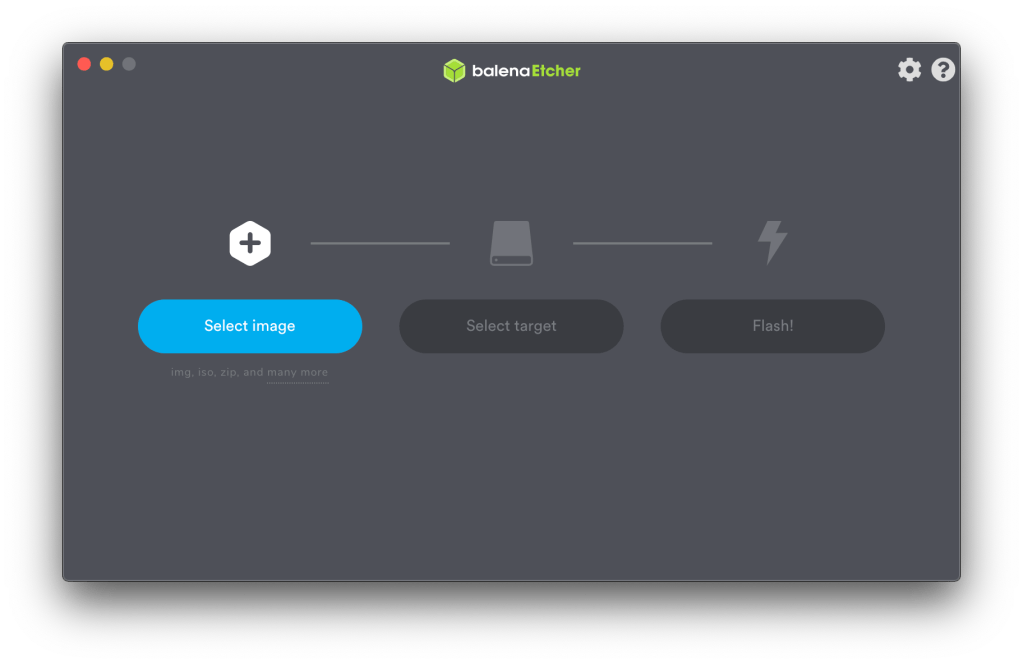
For this example, our tool of choice is Balena Etcher. This is an easy to use tool that makes it simple to set up a bootable device.
After downloading Etcher from their site, if we run it we have a very intuitive interface. This interface allows us to choose a Disk Image (ISO) to burn, a storage medium, away we go. Press Flash.
This can take a few minutes, so grab a snack or some coffee.
After the Etcher program completes, it will auto-eject the USB device, so it can be removed safely, but from there you should be off to the races. You now have a bootable USB device that can install OR test drive an Operating System.
Yes, you read right. You can try try before you buy. You can test drive an operating system before the big install, and if you don’t like it you can abort the process.
Now there is a one more thing that may need to happen before you are able to test out that new distro of Linux. You may need to enter your BIOS settings and disable secure boot. Disabling Secure boot allows you to boot from external devices such as a USB drive. Now while this is technically disabling a security measure, one would need PHYSICAL ACCESS to your computer to perform any nefarious misdeeds, so you can be the judge of that one.
Final step is pretty important. Plug in the USB drive, and boot up the computer. BEFORE THE COMPUTER BOOTS UP, INTERRUPT THE BOOT SEQUENCE BY PRESSING F12. (Different hardware manufacturers might vary, but it is usually F12, F2, Esc, or Del)
If you successfully interrupted the Boot Process, you will see different Boot Options. Choose the one that corresponds with your USB Drive.
From there it should take you to your desired operating system and the Installer Screen.
This wraps up the steps it takes to create and use a USB Boot Drive.
Whether you are taking the plunge to Linux or just testing a new OS out, good luck and stay curious!
